Velvet nails have been all the rage lately and we can see why! They add a touch of luxury to any look and they’re perfect for any occasion, whether you’re dressing up for a gala or just want your everyday manicure to look a little extra special. In this blog post, we will discuss everything you need to know about velvet nails, including how to create them and what colors to use. We’ll also show you some of our favorite examples so you can get inspired!
What Are Velvet Nails?
Velvet nails are a type of manicure that uses a special technique to create a velvety, shimmering finish. It’s also called “cat eye nails” for a good reason – the end result resembles a cat’s eye! This trend is perfect for those who want something more than just a simple polish job.
The great thing about velvet nails is that they can be created with any color polish! However, we recommend choosing darker shades such as black, navy blue, or forest green. These colors tend to show off the matte finish best. You could also try out some fun and unique colors like burgundy or plum.
Another way to achieve velvet manicure is creating nail design. You can paint any design you want on your nails using a regular polish, and then go over it with a cat eye top coat. This will give your design a gorgeous, velvety finish in order to add some dimension to your nails.
How To Create Velvet Nails
The first step is to prepare your nails. This means cleaning them and removing any old polish. Then, achieve the perfect nail shape by filing them. Make sure you have everything you need within reach, like a base coat, velvet top coat, and your chosen nail polish color.
Next, choose your color and paint your nails as you normally would. When applying the polish, make sure to go slowly and carefully so that you don’t get any air bubbles. You can also add some design elements at this stage, like stripes, dots or french tips.
Once your nails are dry, it’s time to apply the velvet top coat. Start in the middle of the nail and then brush outwards towards the edges. Be sure to seal the tips of your nails so that the color doesn’t chip easily. And that’s it!
Look 1: Chic Black Velvet Nails

Look 2: Pretty Pink Velvet Nails
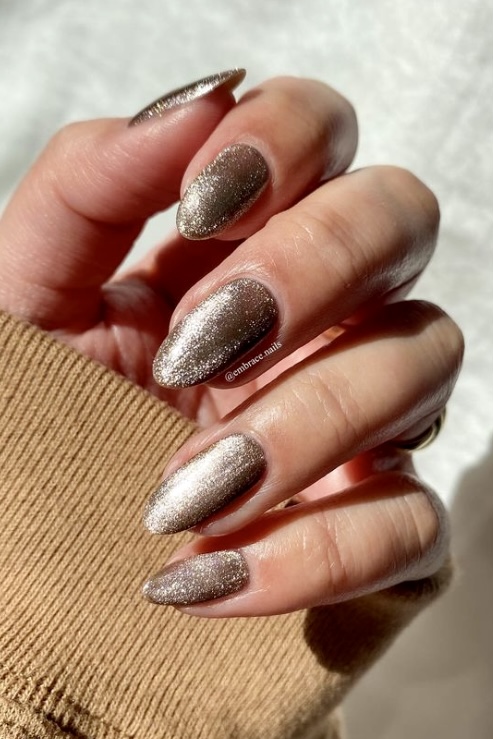
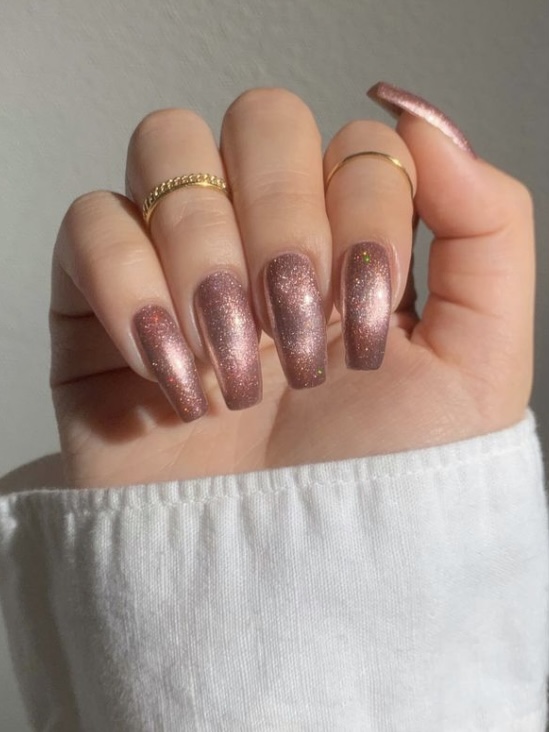
Look 3: Bronze Velvet Design
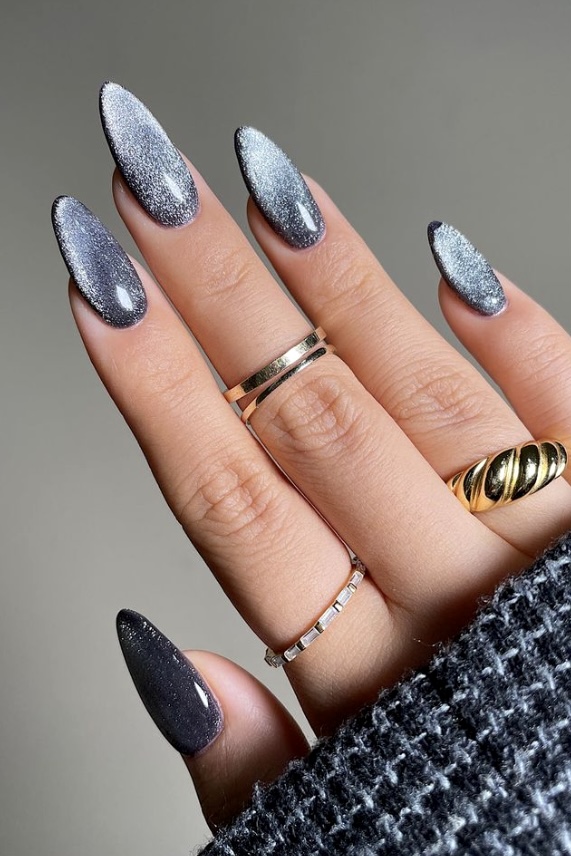
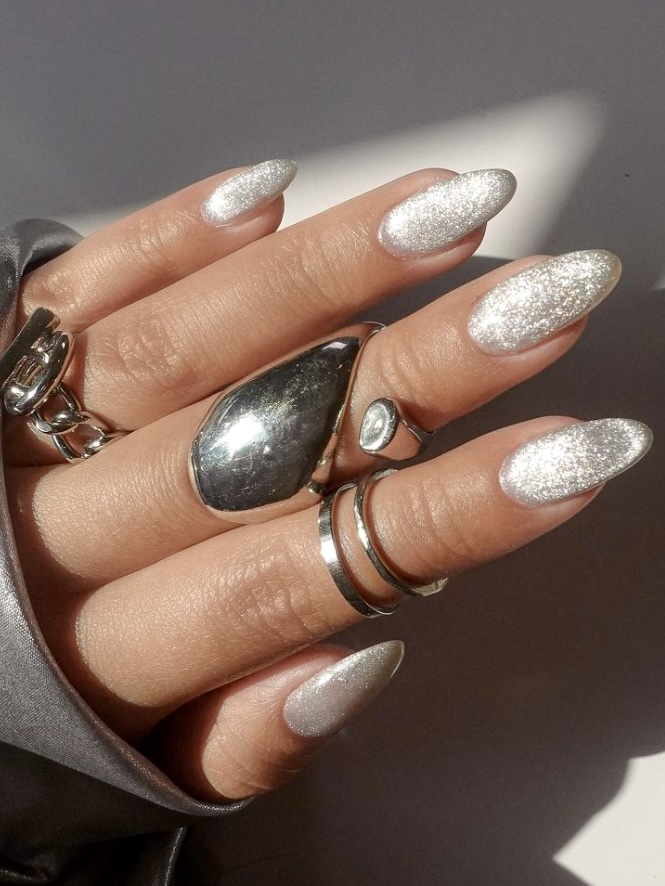
Look 4: Sparkly Silver Velvet
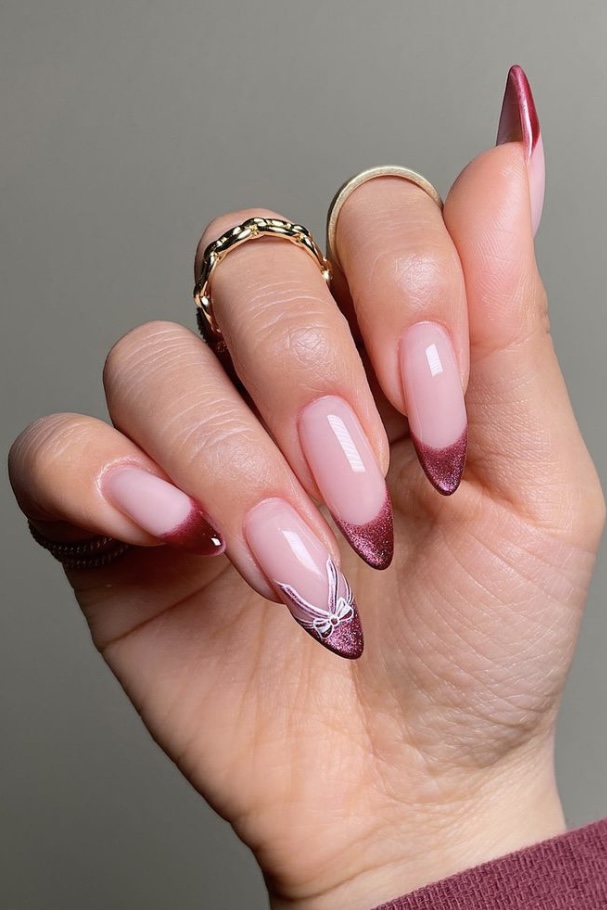
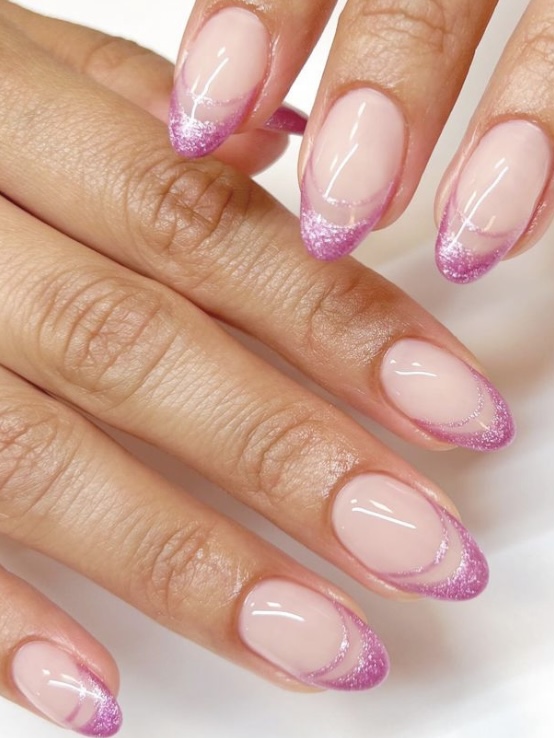
Look 5: Pink Velvet French Tip Nails
Look 6: Velvet Tortoiseshell Print Nails
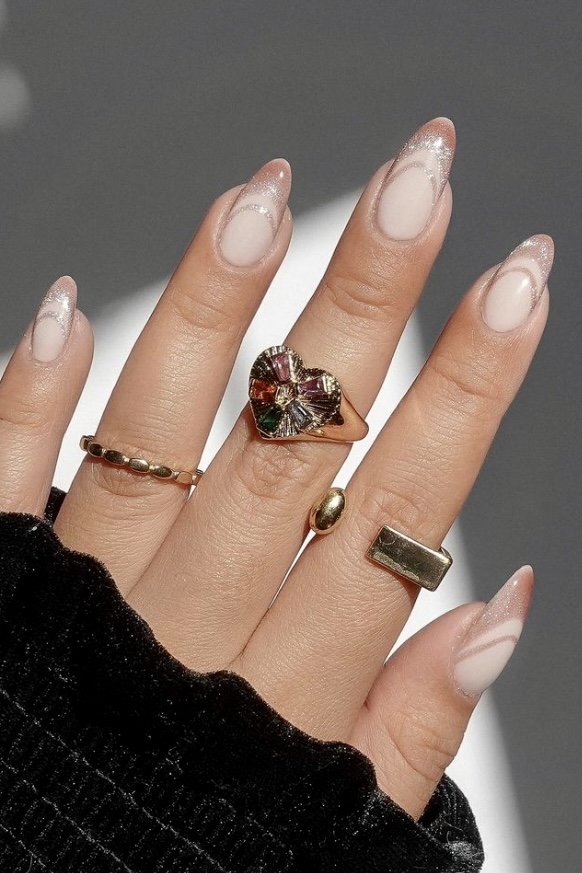
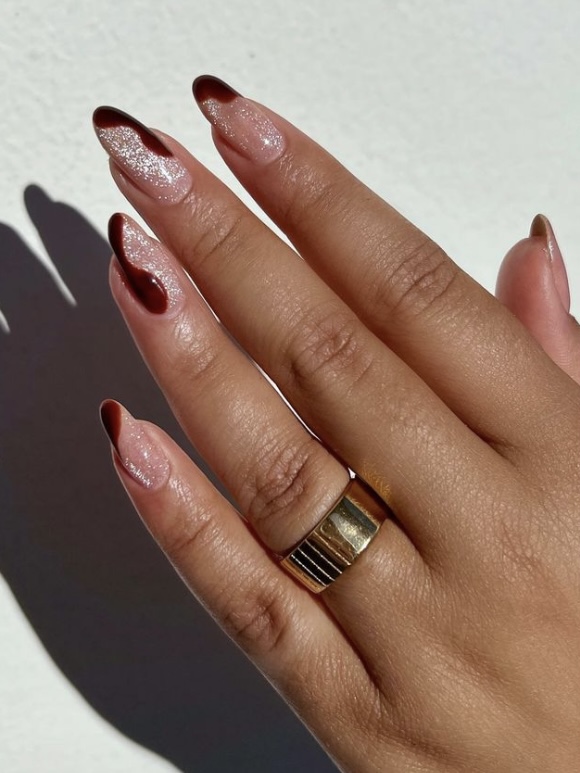
Look 7: Nude Velvet French Manicure
Look 8: Dusty Pink Crystal Nails
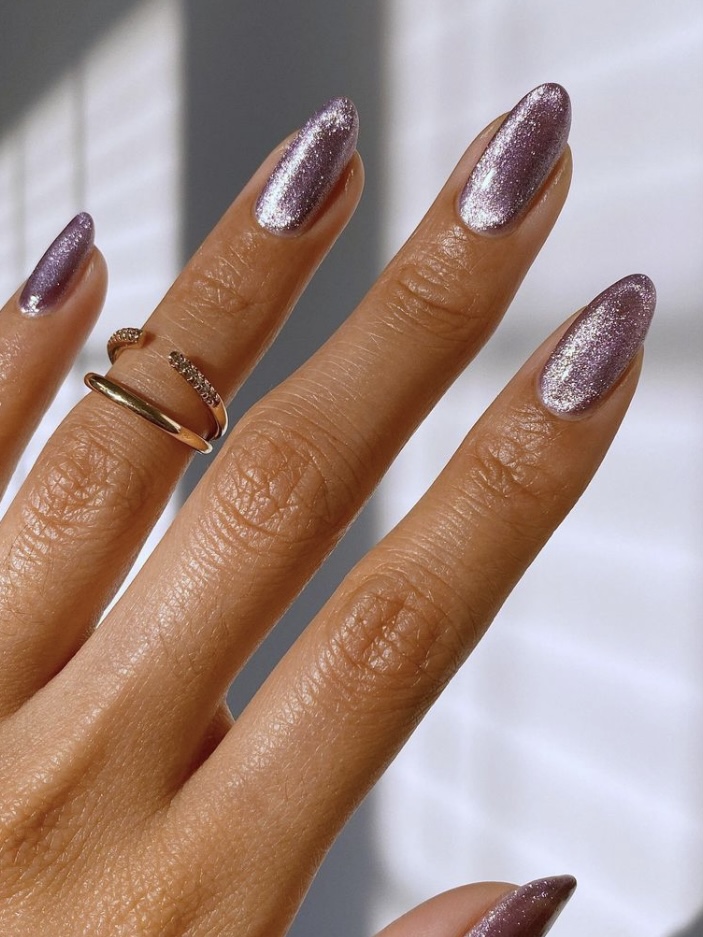
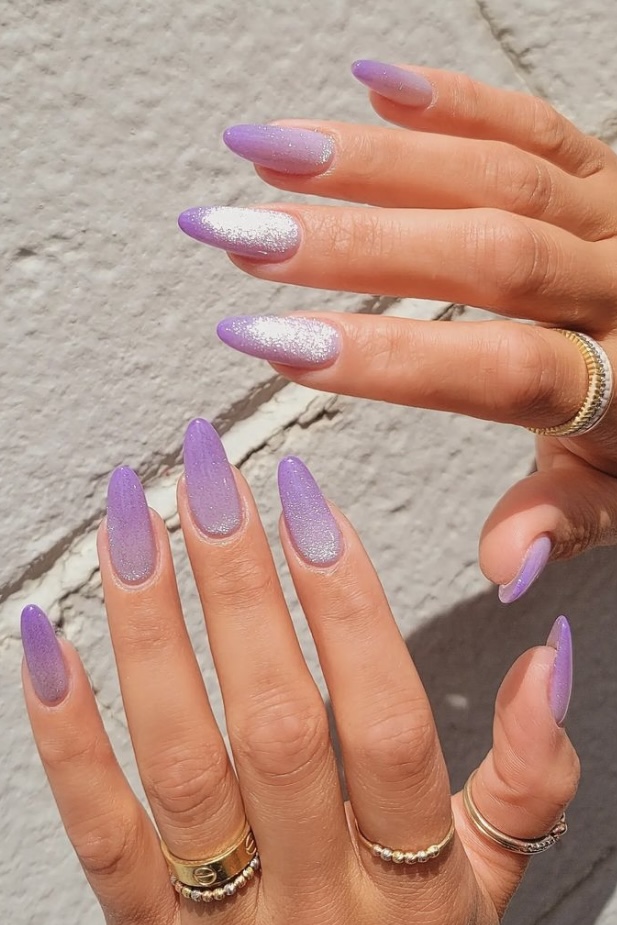
Look 9: Cute Lilac Velvet Nails
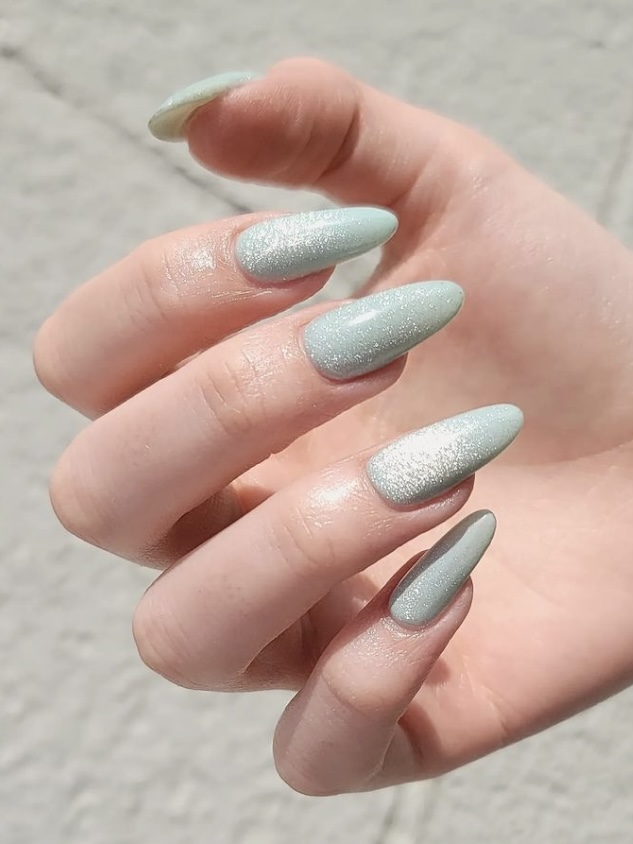
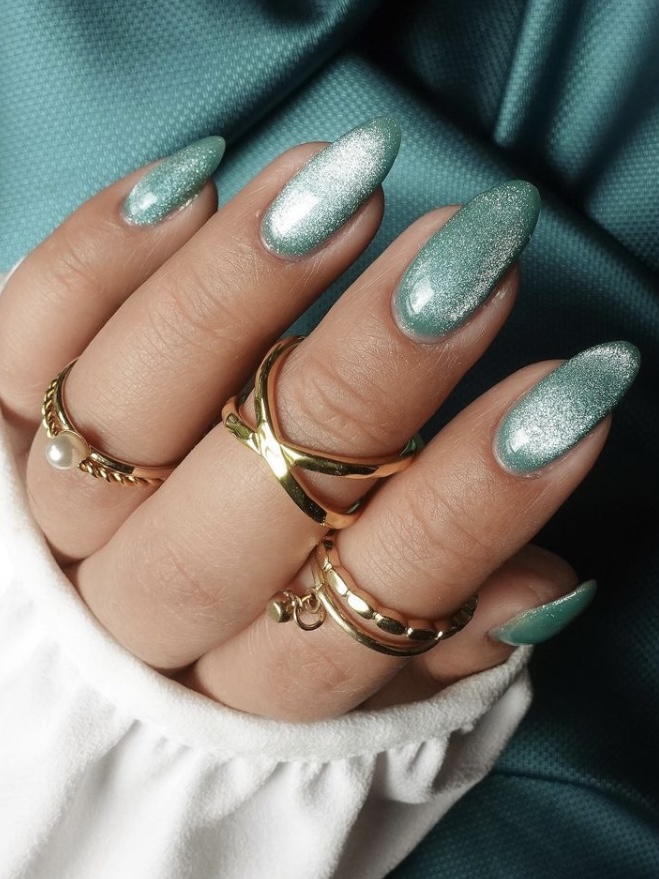
Look 10: Minty Green Velvet Nails
Look 11: Gradient Green Velvet

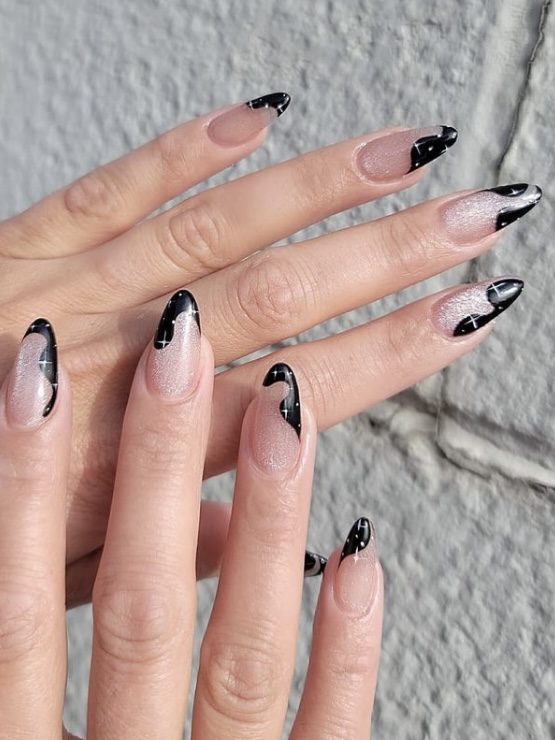
Look 12: Magical Black and Stars Velvet Design
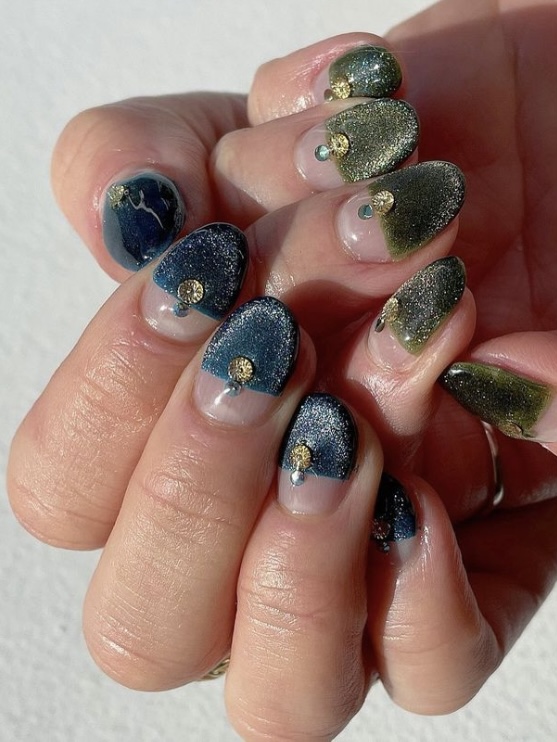
Look 13: Green and Blue Velvet Combo
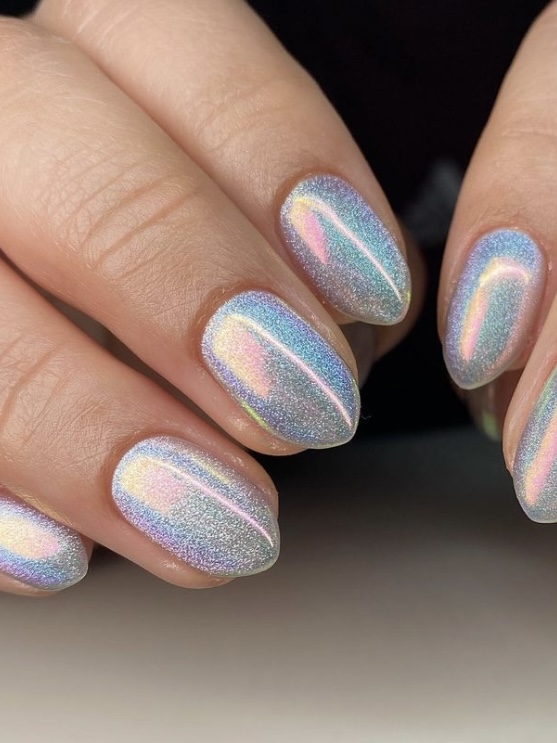
Look 14: Edgy Metallic Nails
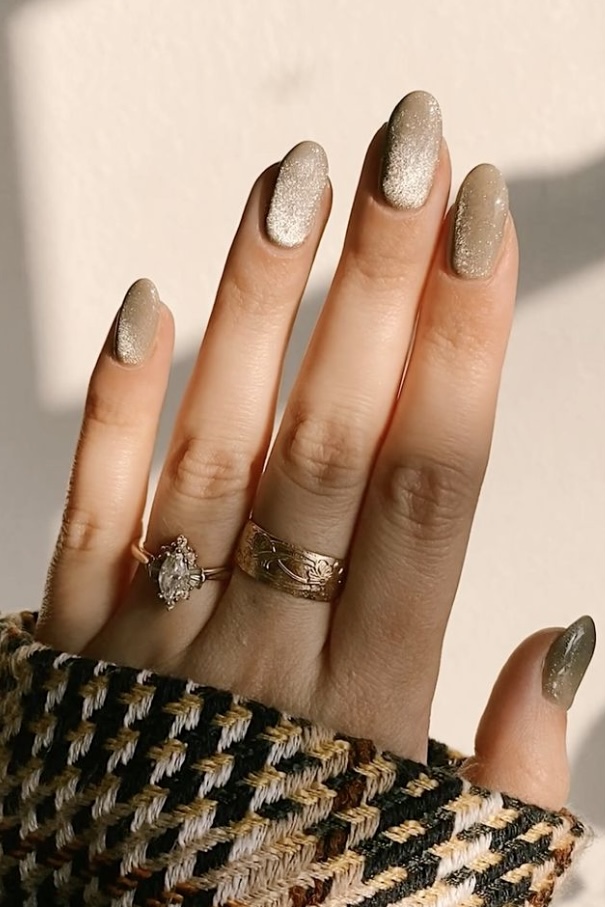
Look 15: Beige Velvet Nails
Look 16: Pink Velvet French Manicure with a Twist
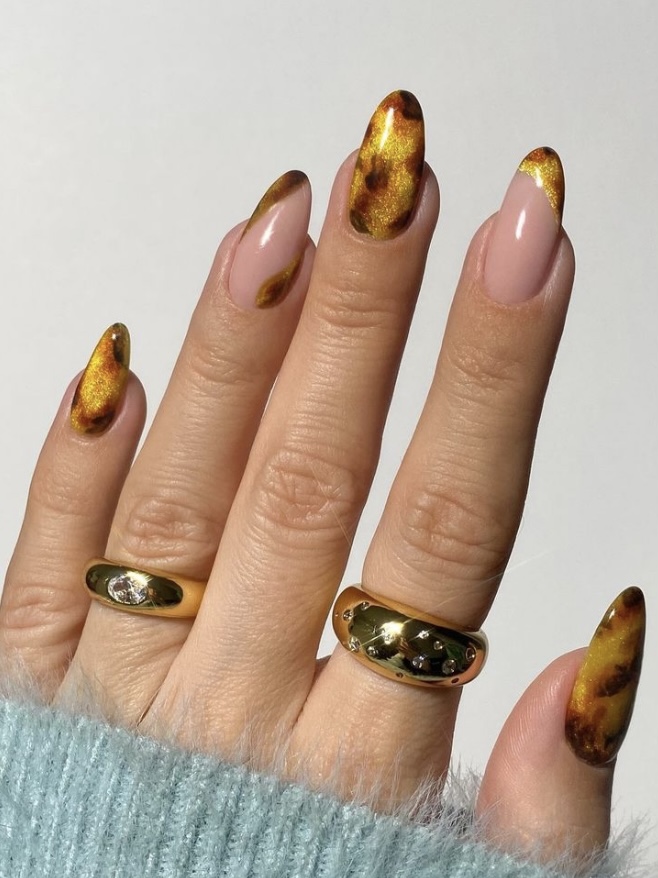
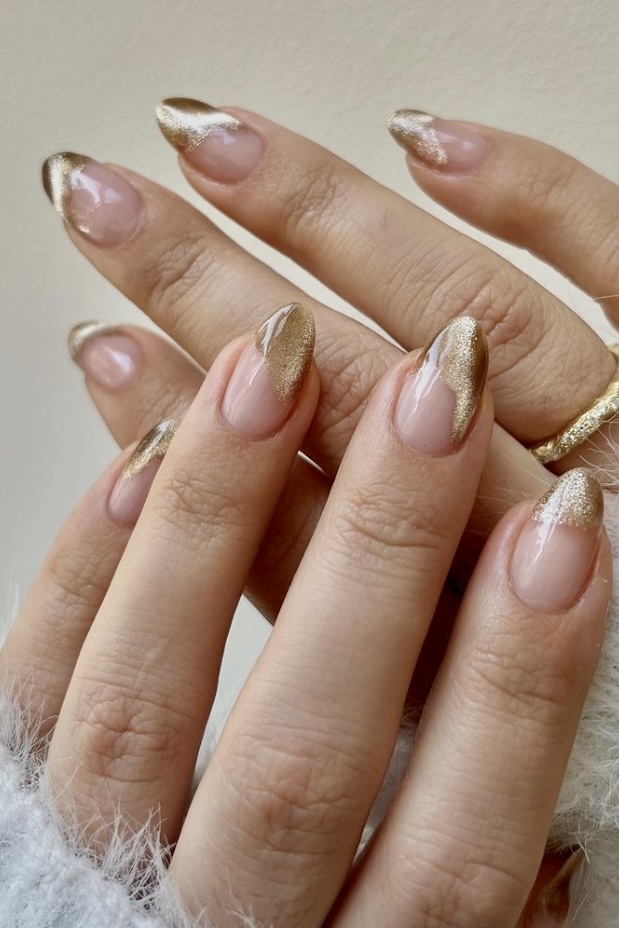
Look 17: Golden Velvet Abstract Nails
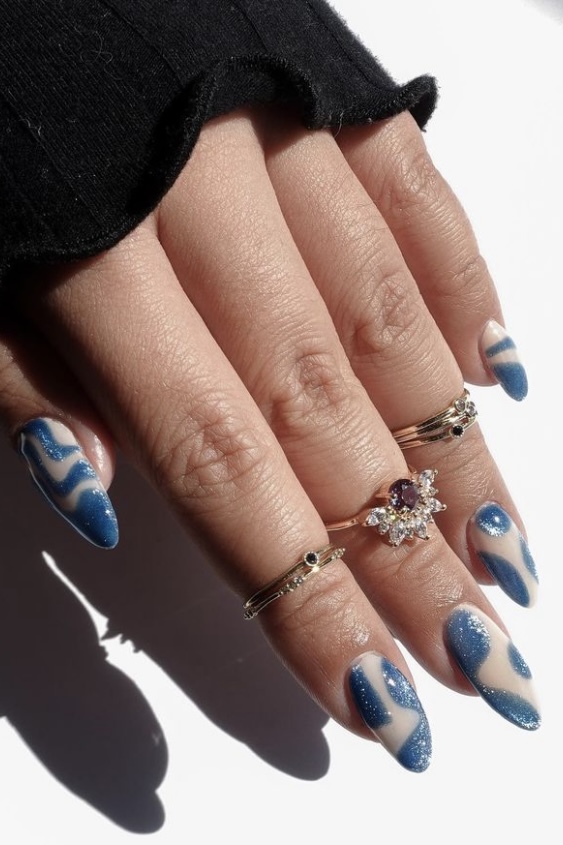
Look 18: Blue Velvet Negative Space
Look 19: Velvet Pink and White Accents

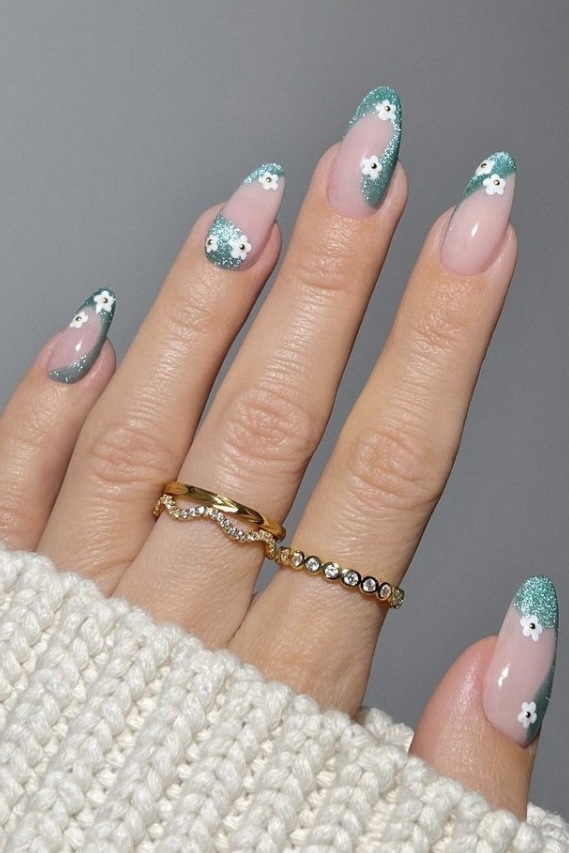
Look 20: Blue Velvet with Flower Design
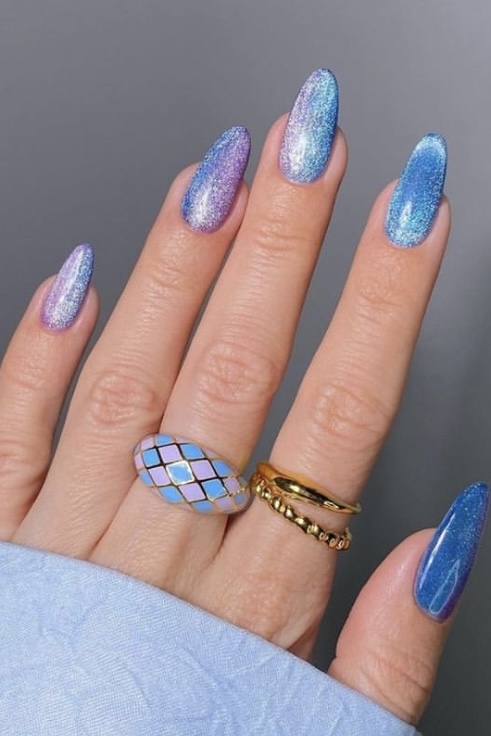
Look 21: Velvet Blue and Purple Ombre Nails
Look 22: Emerald Green Velvet Nails
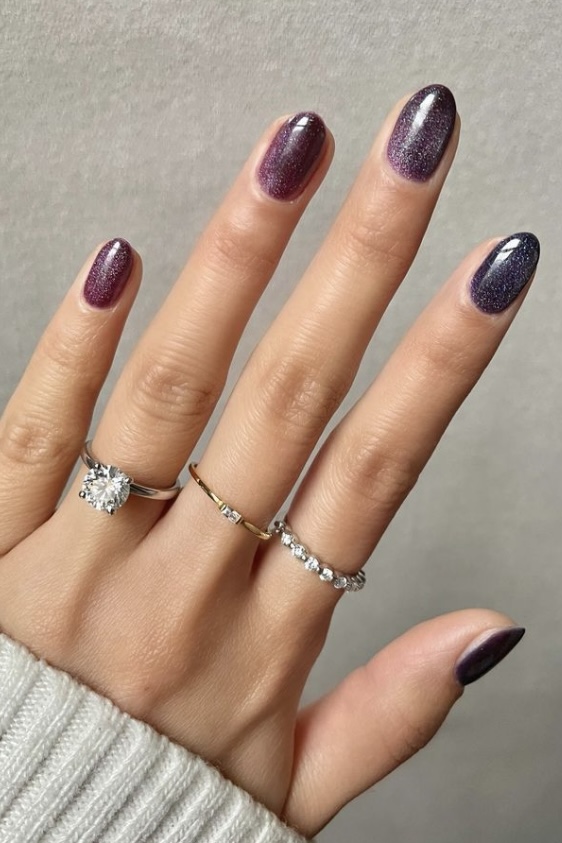
Look 23: Dark Velvet Design for Short Nails
Look 24: Burgundy Accents for Silver Velvet Nails
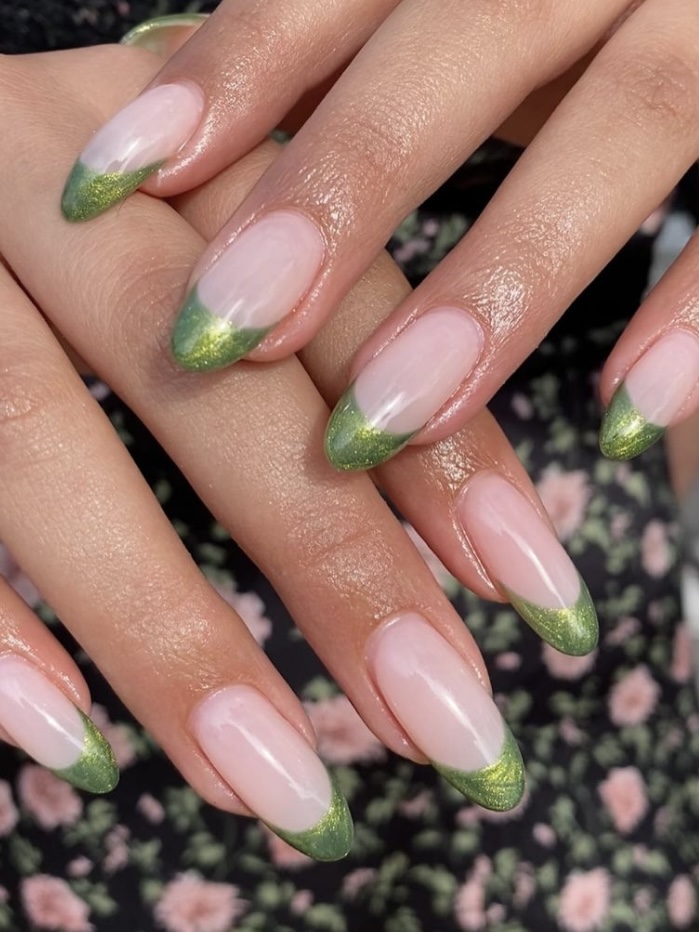
Design 25: Green Velvet French Nails
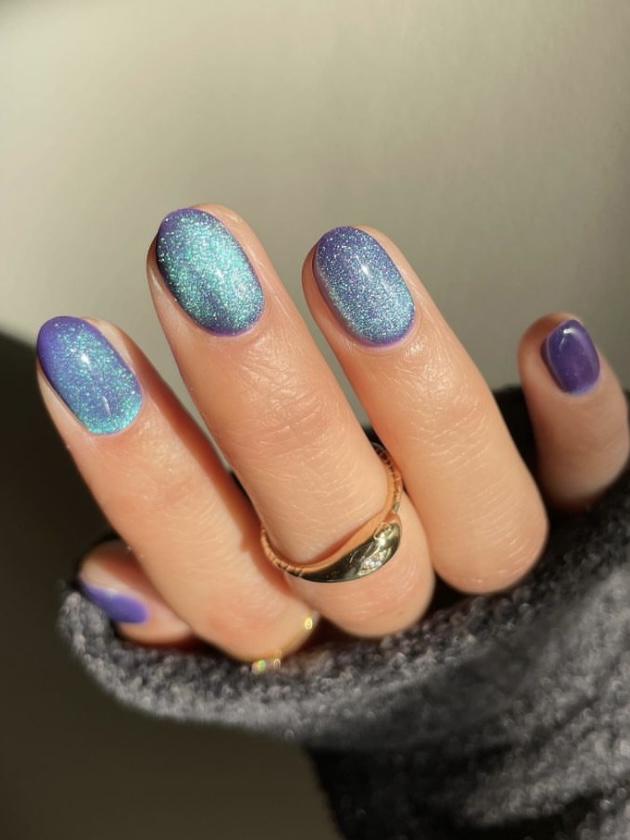
Design 26: Blue Cat Eye Nails
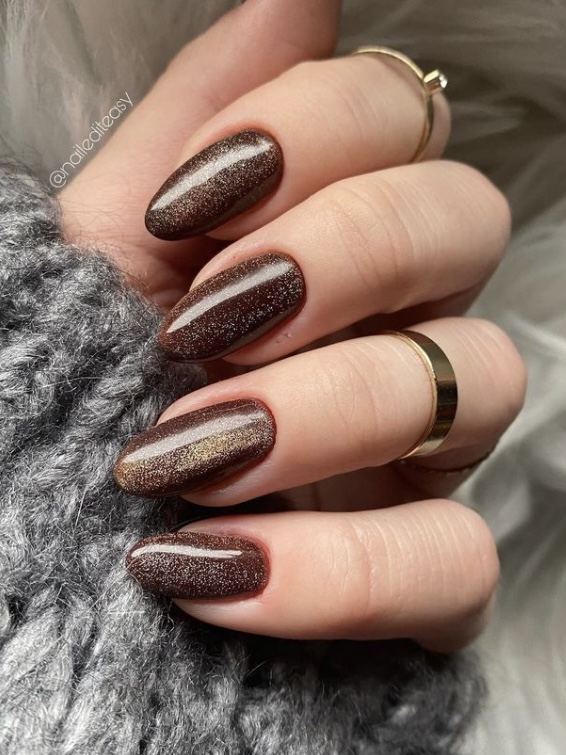
Look 27: Chocolate Brown Velvet Nails
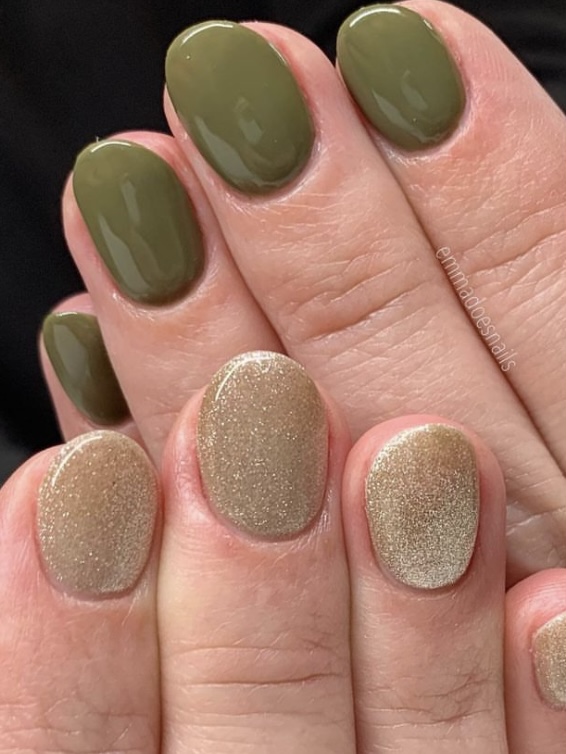
Look 28: Olive Green and Gold Combo
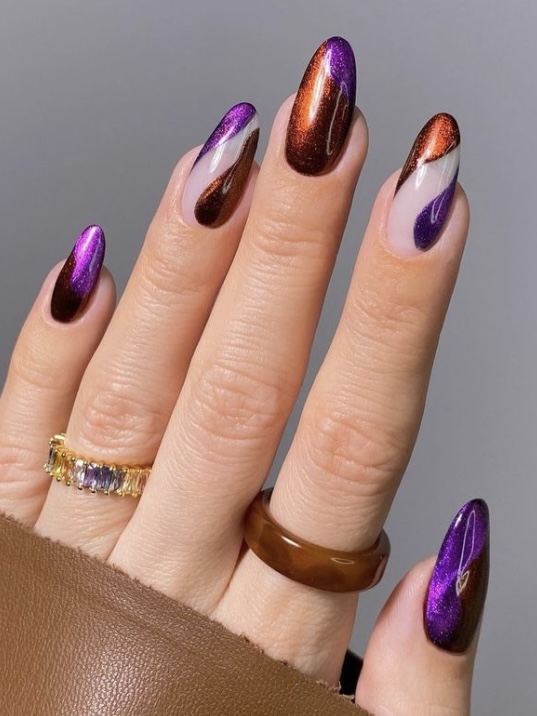
Look 29: Purple and Bronze Negative Space
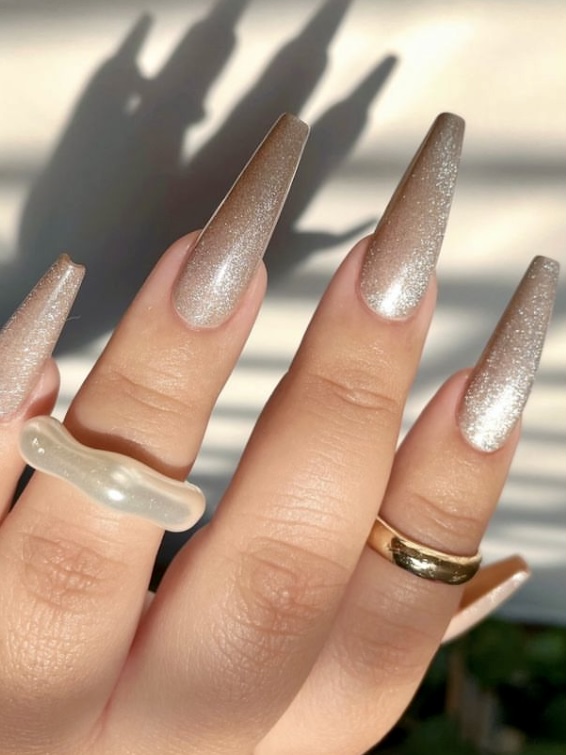
Look 30: Golden Velvet Coffin Nails
Subscribe to my Free Newsletter below. I will keep you updated with the latest fashion & beauty trends every season.